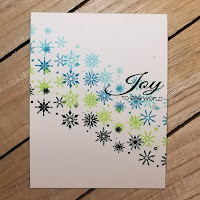
Wednesday, December 18, 2019

CAS-ual Fridays Stamps Week 3


Hey there. Well we are about a week out from Christmas and hopefully your cards are all sent. So in today's post for CAS-ual Friday's Stamps, as their guest designer, I am moving on to baby and birthday cards. I have had such fun doing some design work for this great company this month. I used the Somebunny stamp set and Bunny dies.


My first card started with a watercolor panel that I ink smooshed purple and black distress ink over. When it dried I splattered gold watercolor paint over the background. on a scrap of white card stock I stamped and heat embossed the bunny in gold detail powder and watercolored the moom in the same gold paint that the splatters were made with. I die cut the welcome 3 times from eggplant card stock and glued and stacked them together. The little one was also heat embossed. Trimming my panel down to 4 by 5.25 I mounted it to an top folding, A2 white card base.


My next card started with a white card stock panel that I stamped the balloon bunny and greeting in black ink and colored him with alcohol markers. Then I stenciled the blue clouds and sun over the background. Adding the grass with the markers. I carefully cut the center of the balloon out with and exacto knife for the shaker element. I trimmed the panel down to 4 by 5.25" and mounted a scrap of acetate to the back of the panel over the balloon hole. Then on an top-folding, A2 white card base I attached the red balloon cut from the front panel and used foam to create the shaker pocket for the stars. Finally gluing the stamped panel to the card base.


For my final card I wanted a dreamy watercolor sky for our bunny to be hanging from so I wet a water color panel and played with soft pink, yellow and navy watercolors to create a sky. When it was dry I stamped the bunny, stars and greeting in navy ink. Trimmed the panel to 4 by 5.25" and added to an top-folding, A2 navy card base. Whenever I create a card with a dark colored card base I add a white panel inside the card to write on.

Here is your chance to head on over to the CAS-ual Fridays store and get 15% off your order with the code below. Happy shopping and thank you for stopping by, Sue!

Michelle was super generous with me and I wanted to pass it on so I created a bunch of cards for our local cancer center. They can use them to give encouragement to patients. I used the Hope Ribbon set and Ruffled Ribbon Fri-die. Thanks again Michelle! Check out how you can share with your local cancer centers. 


Tuesday, December 17, 2019

CASology #358: Branch

Hello there. Well if you don't have your cards out yet there is still time to make a few quick, CAS cards. We have a new cue card up today on the CASology Challenge Blog.


Sponsor:  STAMPlorations

My card is a quick one-layer card with a little sparkle. I used a top folding 110 lb white card base that I stamped with the branch from the Papertrey Ink Take A Bough set. Then stamped the greeting from the same set in Versafine black ink. Using Versamark ink I stamped the star and heat embossed it with gold glitter embossing powder and pierced the branch and star with a needle. Using some metallic gold thread I tied them together tying a bow.


I made a second card too. I used the Dotted Blooms from Altenew that I stamped in chocolate ink and then used alcohol markers to color it in. Then I added a little sparkle with a clear Wink of Stella pen.


I am sure the team has some fun projects for you to get your creative juices going. Then I hope you will join us and stamp a "branch" card of your own. 
Thanks for stopping by, Sue.


Wednesday, December 11, 2019

CAS-ual Friday Stamps Week 2

Hello. Hope your week is off to a great start. Today I am doing my next guest designing post for the fabulous CAS-ual Friday's Stamps blog. I used the Snowy Sayings and the Funky Flakes Fri-dies to create some fresh and fun Christmas cards.


Card #1: I started with a watercolor panel that was wet down and ink smooshed with Distress ink in aqua and purple. When dry, I spritzed the panel with Shimmer Spritz. Then die cut the snowflakes from the Funky Flakes dies. The panel was backed with a piece of white glitter paper and die cut snow flakes where glued to the front panel. The greeting was stamped in orchid ink and then I added a few sequins and clear Nuvo drops. The panel was then added to a top folding, A2 white  card base.

Card #2: I cut a white panel to 2.75" by 6.5" and a card base of kraft card stock 6.5" square, scoring it at 3.25". Then using the Funky Flakes dies I cut a brocade blue, kraft and salmon flake from card stock. Measuring to find center of my white panel I first glued down the kraft snowflake then the other two. I stamped the greeting on the bottom of the card base in kraft ink and mounted the white panel to the card with foam tape.


Card #3: This card stated with a watercolor panel that I dropped and swirled different colors of blue watercolor paint onto the panel. I did this in three layers letting the panel dry between layers. Then stamped the snow flake border from the Snowy Sayings set filing in around it with a few of the flakes in navy ink. After stamping the greeting from the same set I trimmed .25" from the panel and mounted it to a royal blue card base and added a thin strip of light blue glitter washi tape.
Here are 4 more ideas for you. I was just on a roll with this great stamp set and dies!


I hope you will join me next week to see what fun new ideas and stamps I will be working with and Michele has offered this great discount code to use for 15% off your order this month! Thanks for stopping by, Sue.


Wednesday, December 4, 2019

CAS-ual Friday Stamps

Hey guys. I was super excited to be asked to be a guest designer over on the CAS-ual Fridays Stamps blog. I had such a great time dreaming up ideas for their fun bold stamps. For this weeks cards I selected the Wheat Wreath stamp set. I really thought this wreath could go beyond fall to Christmas, sympathy, thank you and even a wedding card. 

Card #1: My first card started with a white panel that I stamped the wreath in saffron, mustard and clay dye inks, rotating the wreath a little before each stamp. I used a blender brush to add a little pale yellow ink around the wreath to create a shadow. Then stamped the thankful greeting in chocolate ink, over-stamping it in Versamark ink and heat embossing in clear detail powder. The panel was then trimmed down to 4" by 5.5" and mounted to a A2 chocolate, top folding card with foam tape.


Card #2: I started this card with a bristol smooth, top folding card base that I ink blended with three colors of dye ink keeping the lightest color to the center and blending the darkest to the outside edges. After it was dry I splattered the card with some silver paint, stamped the wreath in Versamark ink and heat embossed with silver detail powder. The greeting from the same set was heat embossed on heavy weight vellum and trimmed to create a band around the card front. 


Card #3: This card started with a watercolor panel that is wet down and used my Arteza brush pens to blend color across. When dry I stamped the wreath and greeting with Versafine black ink and used my circle dies to cut out the wreath. The wreath was then popped up with foam tape and added to a A2 top folding white card base sandwitching the black sewing thread between wreath and card base. The Thankful was stamped with Versamark, heat embossed with white detail powder on a scrap of black card stock and mounted to the wreath.


Card #4: My final card started with a top folding white card base that I rounded the corners and splattered with gold and black water color paint. I set it aside to dry and heat embossed the wreath and greeting in gold detail powder on a black card stock panel. Trimmed and rounded the corners on the panel, mounted it to the card base with black fun foam and added a few white Nuvo drops to the wreath.


As I said this is such a beautiful set I could go on and on with ideas. If you use the code below you can get 15% off your order. The offer expires the end of the month so hurry and get your order placed. Thanks so much for stopping by and come back next week to see what we will have with Snowy Saying set and the Funky Flakes Fri-dies.


Tuesday, December 3, 2019

Ellen's 12 Tags of Chrismas


Hello. Yes, I said I was done with tags but then...here I am making more. This time I am challenging myself to try a black and white spin on them. I also will try to use the same shape tag for all twelve. I started by stamping a bunch of images with the Holiday Characters set. Then colored them with alcohol markers in traditional colors and a gray scale.
This is where I wanted to try to beef up on coloring skills. By just using shades of gray to get the shadow and depth I wanted to create.

Tag 1: Rudolf The Red Nosed Reindeer
Inspired by Lisa.

 Tag 2: Joy to the World
Inspired by Lisa.

 Tag 3: I Saw Mommy Kissing Santa Claus
Inspired by Lisa.


CASology #357: Gingerbread

I don't know how it happened but "bam" here we are in December. Well today we have a brand new cue card challenge on The CASology Blog.


This card came together so quickly and brought a smile to my face besides. I started by die cutting the white tag and stamping the gingerbread man from the Papertrey Ink's Holiday Button Bits set. Tied on some red bakers twine, glued on the red heart buttons and added two black Nuvo drops to his eyes. Mounted the tag to a kraft top folding card with foam tape and stamped the greeting from the same set in Versafine black ink.


I hope you can join us on the fun challenge. Thanks for stopping by, Sue.


AAA Cards Challenge #282

  Hey there. We created a new theme this year for a few of our challenges on the AAA Cards blog , "Follow My Lead". One of our des...