Wednesday, September 29, 2021

Just 3 Very Different Cards

Hello. Yes, Instagram is still giving me fits. So here are three cards that I wanted to enter in a few challenges. This first card is for the Simon Says Stamp Monday Challenge "touchy feely". Tons of texture with staples, paper clip, washi tape, heat embossing and brads all with a roughed up edge.


The next card is for the Newton's Nook Inky Paws Challenge using the Thankful Thoughts set.


My final card uses the Trigonometry and Lavender Bud set. My color palette and flower are from the September Inspiration Challenge. The Timeout Challenge is a garden theme. 


Thanks for stopping by, Sue.


In the Garden

Hey there. Instagram is not cooperating again and won't let me link anything. So this is a card I made for 3 challenges.

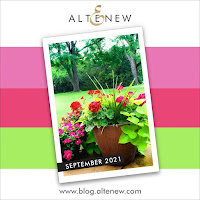
My card uses the colors from the Altenew challenge and the sets Halftone Squares and Lavender Bud sets. The Simon Says Stamp Monday Challenge is "touchy feely" the texture of the Dymo lable, ribbon, washi tape and Nuvo drops all added to my card a tactile effect. The Timeout Challenge Inspired by words fits the bill with my flower image. Thanks for stopping by, Sue.


National Coffee Day Hop

 Hey there! Over on the Stamplorations Blog we are joining in with the National Coffee blog hop to inspire you.


I created three cards with some great Stamplorations product. You will want to comment on Stamplorations' blog post for a chance to win some fun coffee themed products!

I wanted to play with acrylic paint. I used terracotta paint with a one inch brush to create brushstrokes on several panels.

This card started with a white top folding card that I stamped the coffee beans in chocolate brown ink.  Using my chocolate brown panel I stamped the cup from the After Coffee set in the same brown ink over the acrylic paint. Then gold heat embossed the With Coffee greeting over the top and mounted it to my card front with foam tape for dimension.


My second card I stamped with the Literary Caffeine-ations set down the side of another acrylic paint panel. Then stamped and cut out the center of the coffee mug from the After Coffee set to create a shaker card with real coffee grounds. The card base was a white top folding stamped with the same mug in chocolate brown ink. I added a few olive green accent pieces to make it pop.


With my final acrylic paint panel I heat embossed the coffee image from the Sweet Kindness set over the paint with gold detail powder. Then colored in the image with water based markers and mounted to a chocolate brown card base.


There are some super talented girls on the Stamplorations Blog sharing their ideas with you. I hope you will go show them some love!


Thursday, August 12, 2021

Two Quarters Embossed

Hello, I wanted to play with a couple of challenges today. Instagram is still giving me fits. My card started by masking two quarters of my card and ink blending those areas.  Then I took the greeting and stamped it in black Versafine ink and heat embossed it with clear detail powder. Finally I trimmed and mounted the panel to a navy card base with foam tape.


Simon Says Stamp is having an embossing challenge this week. Thanks for stopping by, Sue.


Color Me Blooms

 Hey there! It has been a while since I posted. I usually post to Instagram but it is broke for me today. lol! I wanted to highlight the new Stamplorations paper goods subscription today. I used the Color Me Blooms set to create four cards using four different techniques.


This first card uses one of the panels and some simple ink blending. I masked the sides and then ink blended the center of the panel.


This card uses alcohol markers with a dot technique.


A very loose water color technique was used to create this card.


Finally I used an over stamping technique for this card front. So much fun to change it up for these quick card fronts. 


This subscription is such an easy way to create cards! Thanks for stopping by, Sue.


Sunday, July 11, 2021

Stamplorations' Trifecta Cardmaking


Hey there! I am up on the Stamplorations' Blog today with a fresh "trifecta", three cards combining stamps, stencils and clear stickers. My cards all contained Bloomful stamp set, Bloomdalascopic and Delicate Links stencils and Happiness Here clear stickers. I think the stencil I used might be retired but Bloom Boldly or Stained Glass might be good replacements.
For the first card I started with a little ink blending then added glimmer paste over my blended panel. When dry I trimmed it down and mounted it to a white A2 card base. I then stamped and colored the tag with alcohol markers, added glossy effects and glitter to the flowers. When dry I added bakers twine, the clear greeting from the Hey Sunshine set and mounted to the blended panel with foam tape.


The second card has simple ink blending to a fad out and just some black ink stamping with the Bloomful set. 


My final card used a completely blended panel with the Delicate Links stencil layed over and spritzed with water to create a fade. I use just regular die ink and blending brushes to create my panels. I stamped the Bloomful again with black ink on both the panel and the card base to create a continuous image. The clear sticker was added to the stamped tag along with more twine. 

*Tip- After placing your clear sticker on your card stock flip it over and rub a teflon bone folder over the back to push out any air bubbles.


Thank you so much for stopping by. I hope you will create some "Trifecta" cards on your own and share them with us!

Tuesday, June 8, 2021

CASology #392: Strength

 Hello. Wow, here we are in June already and we have a new challenge for you on the CASology Challenge Blog.  


I have a one layer card with ink layering for you. I started by using the Hope ribbon set from CAS-ual Fridays in my stamp platform. By using the stamp platform I could blend 3 colors of pink ink without any lines. I ink up the portion of stamp then feather out the inked edge with a micro-fiber cloth. I then used Versafine black ink to stamp the greetings and finished off with a few black gloss Nuvo drops.


Thanks for stopping by. I hope you will take some time to make a card and share it on the blog.


Sunday, June 6, 2021

Stamplorations Trifecta Cardmaking


Hey there! Can you believe it is June already? 
Today I am working the "trifecta" again with stamps, stickers and stencils blended to make three birthday themed cards.
I used the same stamp set, Kathryn's Big Wish, and clear sticker set, Mixed Media Backgrounds #1, for all three cards.


My first card I stenciled the Stars Align along the left edge with pale yellow ink on a pale yellow card base. Then stamping the candles in black ink on card base and a scrap of cardstock, I colored the candles with alcohol markers. Placing one of the Mixed Media Background #1 stickers over the scrap cardstock and trimming it down to size. I die cut the happy greeting from another scrap of cardstock, covered the candles and happy panel in glossy effects and mounted it to the card base with foam tape.


The next card started with the Hello and Company stencil. using just the "happy" word I stenciled the card front with pale yellow ink. Setting the base aside for a minute. Then stamping the balloon from the stamp set in black ink on a scrap of cardstock and coloring it with alcohol markers and placing another Mixed Media Background stickers over the balloon trimming it down to size.


 To soften the base a little I added vellum and hand drew the balloon string with a black marker. The celebrate sticker is from the Inspirational #2 sticker set and I also added a few bits of Newsprint Background Bits stickers. My final step was to mount the balloon panel to card base with foam tape.


This card also started by making a pale yellow card base and ink blending the Stars Align stencil across the card. I then took the dots from the stamp set and added them over the stenciling with pink ink. Also stamping a couple of the sucker images in the same yellow ink. 


The sucker image was also stamped in black on a scrap of cardstock and colored again with alcohol markers. Then placing a Mixed Media Background sticker over the scrap and trimmed it to size. The greeting is from the Sweet Kindness set. After the panel was mounted to card base with foam tape I added the bakers twine and Stickles to the card front.


I hope you enjoy this concept and can see the real mileage you can get from one stamp set, stencil and sticker set. 
Thanks for stopping by, Sue.


Sunday, May 30, 2021

AAA Cards Challenge #191


Hey there. I was super excited to be asked to be a guest designer on the AAA Cards Challenge this week. We will be making a no layer card with hexagons. I had so much fun with this that I made three cards.


All my cards are 110lb, white top folding A2 card bases. Using the Honey Bee Stamps nesting hexagon dies I cut a stencil from card stock. Then using Distress Ink I blended two colors in each hexagon overlapping them as I went. I then used a Block Alphabet die set from Papertrey Ink to cut out my "hb" window. This gives you the contrast color (white) while still keeping your card one layer. Then I added the Happy Birthday from a Concord and 9th set in dark purple ink.


This card uses the Happy Hexagon set from Papertrey Ink with just straight up stamping.


My final card uses another stencil that I created with the Echo Park Hexagon Confetti die. I just ink blended a little yellow ink in a small area through the stencil. Then stamped and heat embossed the bee from the Papertrey Ink Honey Bee set in black ink with clear detail powder. Added in a darker yellow for the bee's body.


I hope you will dust off your no layer skills and join us on the AAA Cards Challenge with some hexagon magic.
Thanks for stopping by, Sue.


Tuesday, May 25, 2021

CASology #391: Photo

Hello. Are you up for a new challenge today? Our new cue card on the CASology Challenge blog is up today.


My card for this challenge started with a top folding A2, kraft card base that I stamped the robot and greeting in black ink. The stamp set is Big Robots from Stamplorations. I then die cut 4 white slide frames from white card stock and glued them together form some dimension. Using the same stamp set I stamped and heat embossed the word smile on the frame.


Placing the frame on the card front I marked the inside corners with a pencil and then colored only that portion of the robot with alcohol markers. After gluing the frame to the card front I coated the robot with Wink of Stella.


I hope you will take some time to read through our rules and join us in this fun challenge. Thanks for stopping by, Sue.


AAA Cards Challenge #282

  Hey there. We created a new theme this year for a few of our challenges on the AAA Cards blog , "Follow My Lead". One of our des...